|


| |
Amateur astronomy can be approached in as many ways as there
are people. Each come to the hobby with their own perceptions
and expectations, hoping to fulfill those through observing the
sky with their naked eye, or different optical aids, or even with
advanced electronic devices such as CCD's and their host computers.
We look up, way up, and come into contact with a wonderful array
of new realities we did not know existed, or knew about only through
the abstract knowledge imparted by books and other third-party
media.
After having observed the night sky off and on for the past
two decades or so (and more seriously for the past year), I gradually
realized that my own enjoyment of this activity comes from the
aesthetic visual experience of it all. The simple and often subtle
beauty of the swarm of objects on display up there is frankly
quite intoxicating, especially under a black, moonless night sky
with a fine telescope at your side. I read numerous articles about
the benefits of sketching what you see at the eyepiece, if only
for the benefit of the permanent record that it represents. I
often thought that it would be interesting to try it out one day,
but never realized how powerful the experience could be. When
you really sit down and apply yourself with the proper tools,
sketching becomes a way of *really* knowing the object under your
gaze. The final product is not so much important as the actual
process of *seeing* every single part of the image, trying to
render what you see on paper as accurately as you can. After having
spent an hour or two studying the same object and having put down
on paper a rendition of it to your satisfaction, I now know that
object much more than just its position and dimension in the sky,
or even the mere fact that it is there. The procedure is simple
and nothing is in the way but your eye, the eyepiece and the clear
atmosphere above you.
As part of an ongoing effort to sketch the Messier objects,
here are some examples of the work I have done for the past months.
I hope to complete the catalogue and my "personal album"
of the Messiers in the next year or two.
Globular cluster M13 - NGC6205
August 26 1998 - 22h58 PDT
Sooke, British Columbia
Naked eye limit: 5.6
Remark: Galaxy NGC6207 about 30' NNE |
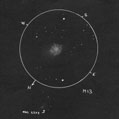 |
25cm f5.8 Newtonian
20mm Plossl
42' field |
Planetary nebula M27 - NGC6853
September 16 1998 - 23h30 PDT
Sooke, British Columbia
Naked eye limit: 5.2
Remark: Slightly brighter condensation seen SW of center of
nebula |
 |
25cm f5.8 Newtonian
20mm Plossl
42' field |
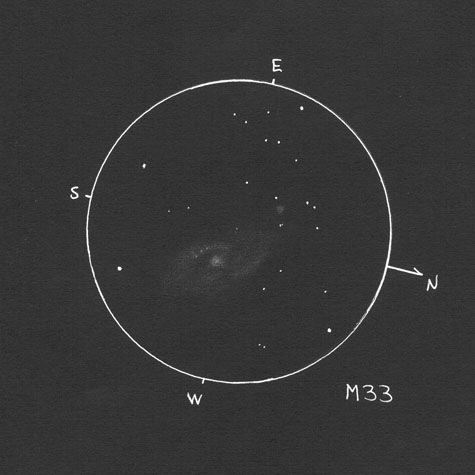
Galaxy M33 - NGC598
September 20 1998 - 02h09 PDT
Sooke, British Columbia
Naked eye limit: 5.6-5.8
Remark: HII region NGC604 visible ~ 12' NE of nucleus |
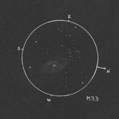 |
25cm f5.8 Newtonian
20mm Plossl
42' field |
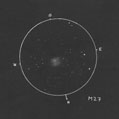
Globular cluster M92 - NGC6341
August 28 1998 - 21h45 PDT
Sooke, British Columbia
Naked eye limit: 5.6 |
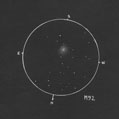 |
25cm f5.8 Newtonian
20mm Plossl
42' field |
Click on any of the thumbnail images to see the
original images
The Technique
When I am at the eyepiece, I do my original sketch on white
paper, which I then recopy onto a more natural-looking black paper
indoors. So for the first stage (at the eyepiece), I find that
a regular HB pencil is perfectly adequate, along with a good eraser
of the white Staedtler type that almost everyone must have used
at school.
My drawing "technique" is nothing magical: I simply
use my pencil in a horizontal fashion while applying different
shades of gray, which I can choose to blend using my finger if
the object is diffuse, such as a galaxy or the unresolved stars
of a globular cluster.
When I recopy my sketch onto black paper, I first use a
wonderful pen named the "Milky Gel roller". It presumably
comes in many colours but the one I have is - appropriately enough
- a pure milky white ink, which is quite nice to depict the field
stars with. On the original drawings I have, the visual effect
is quite startling and contrasty, but the Web version presented
here will likely differ somewhat from that, depending on the quality
of your monitor. The only difficulty I have with this pen however
is the relative lack of control it provides in drawing stars with
different magnitudes - the smallest dot I can achieve is about
1-2 mm, and also you obviously cannot erase your "stars"
once they are in place. Nevertheless, I found no difficulty in
adapting to those small constraints.
Once the field stars are in place, the final step is to
draw the actual object at the proper position and for that I use
a soft white pastel crayon from Pitt (a German company). Here
again I found that it took me some time in getting used to it,
as once applied it is somewhat difficult to spread around with
a finger. After some experimentation, I now use a combination
of "finger smudging" and a special putty-like eraser
that one can knead to any shape, and which gives me a high degree
of control when I want to tone down a shade. Often just touching
the paper with it will pick up the excess pigment until I get
it just right.
Next month, expect some more Messiers
from the Virgo Cluster and Leo.
|